Shared Features
There are several features shared across requirements, tests, and bug reports. Here you can read more about import and list views.
Lists, Views, and Filters
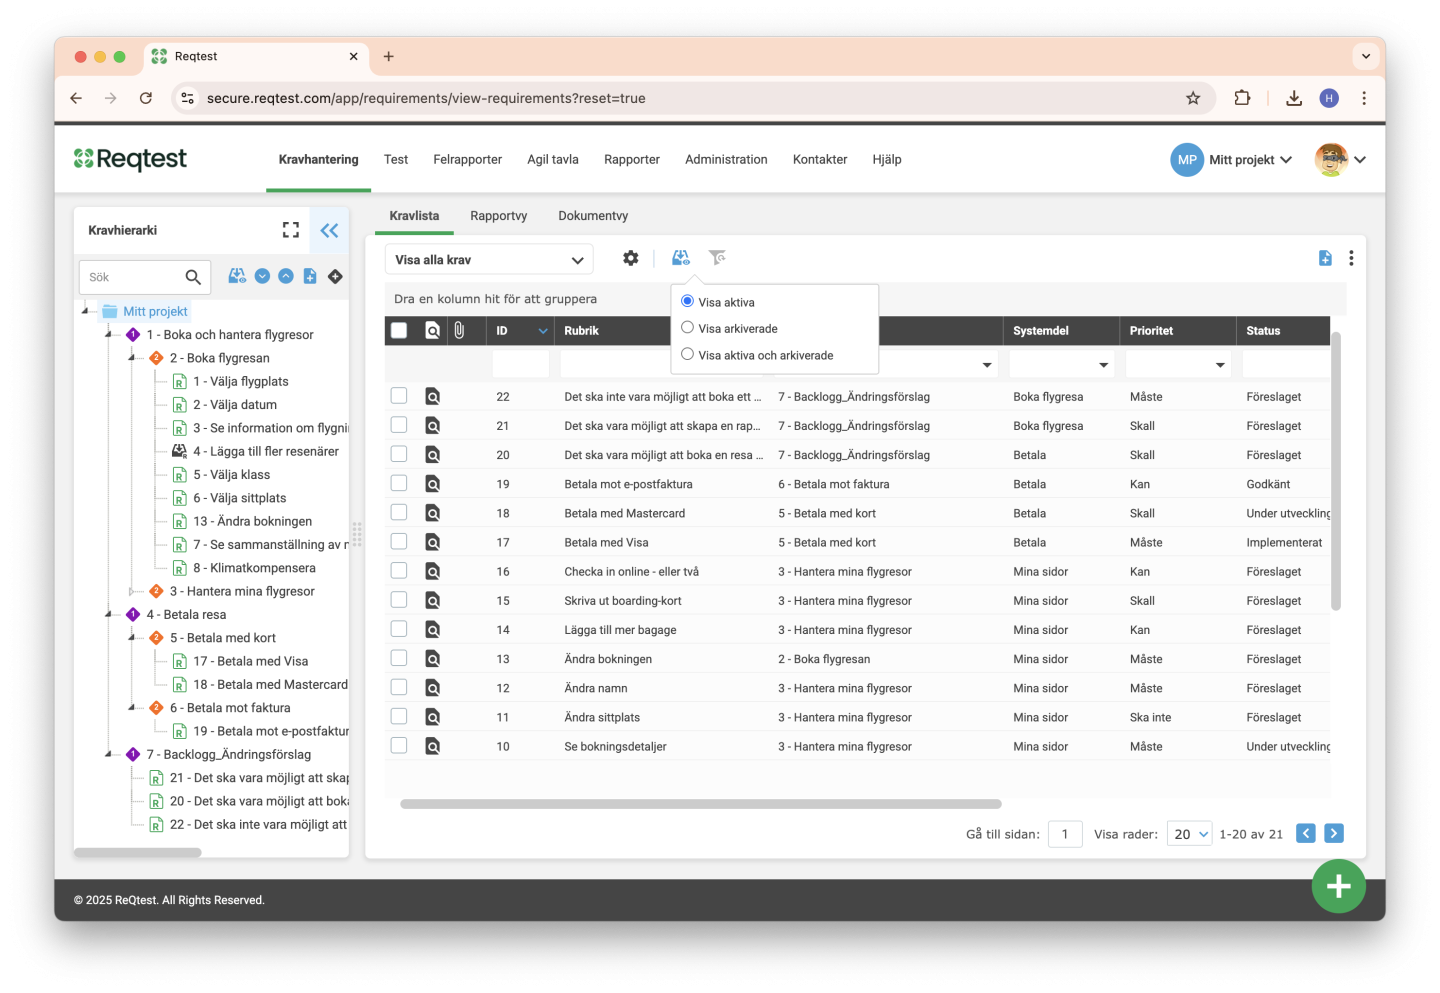
All Reqtest modules are built around list views and how they are managed. By organizing your lists effectively, they become easy to use, making it simpler to find and display relevant information.
A list consists of several columns, and each column has a filter. To choose which columns you want to display, click Show/Hide Columns.
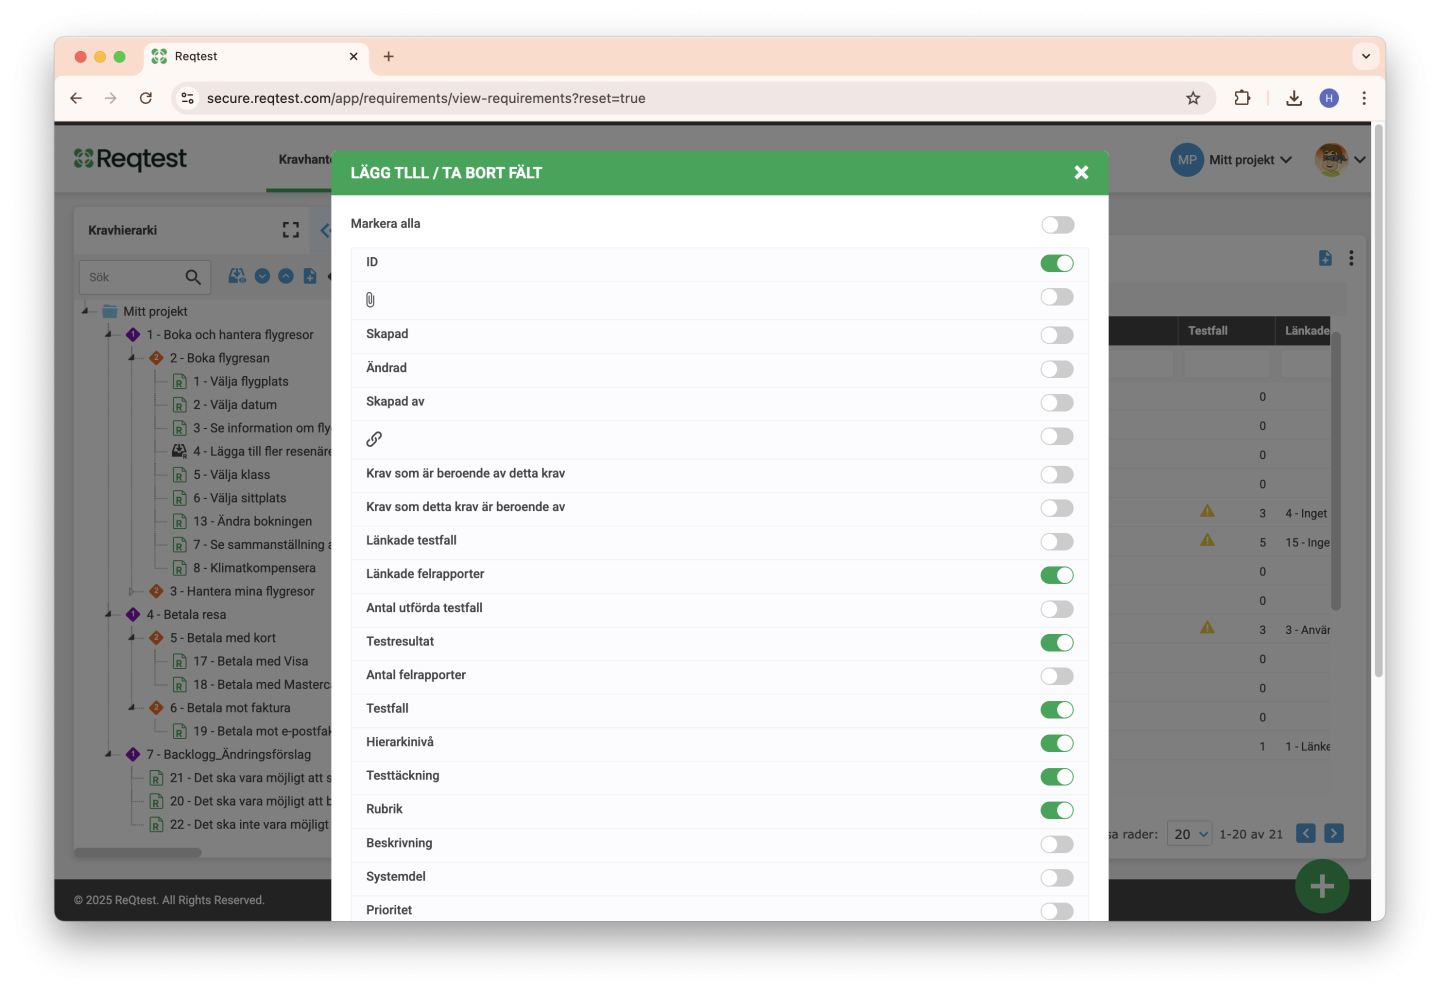
Here you choose the columns and fields you want to display.
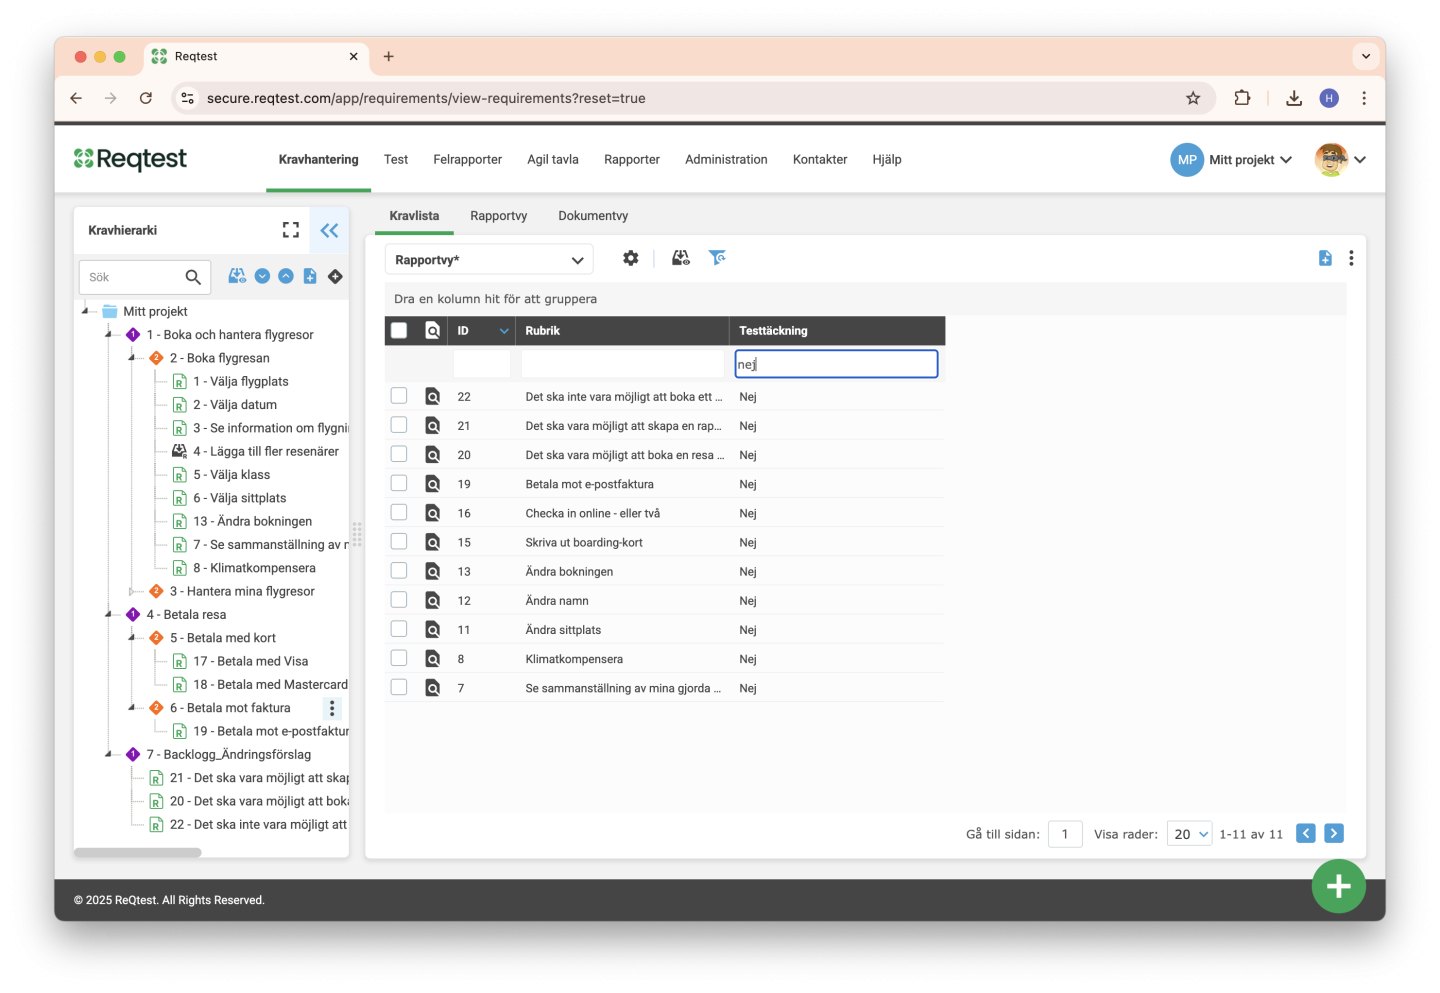
You can then apply different filters to narrow down your data. In the example below, we’ve chosen to display requirements that lack test coverage.
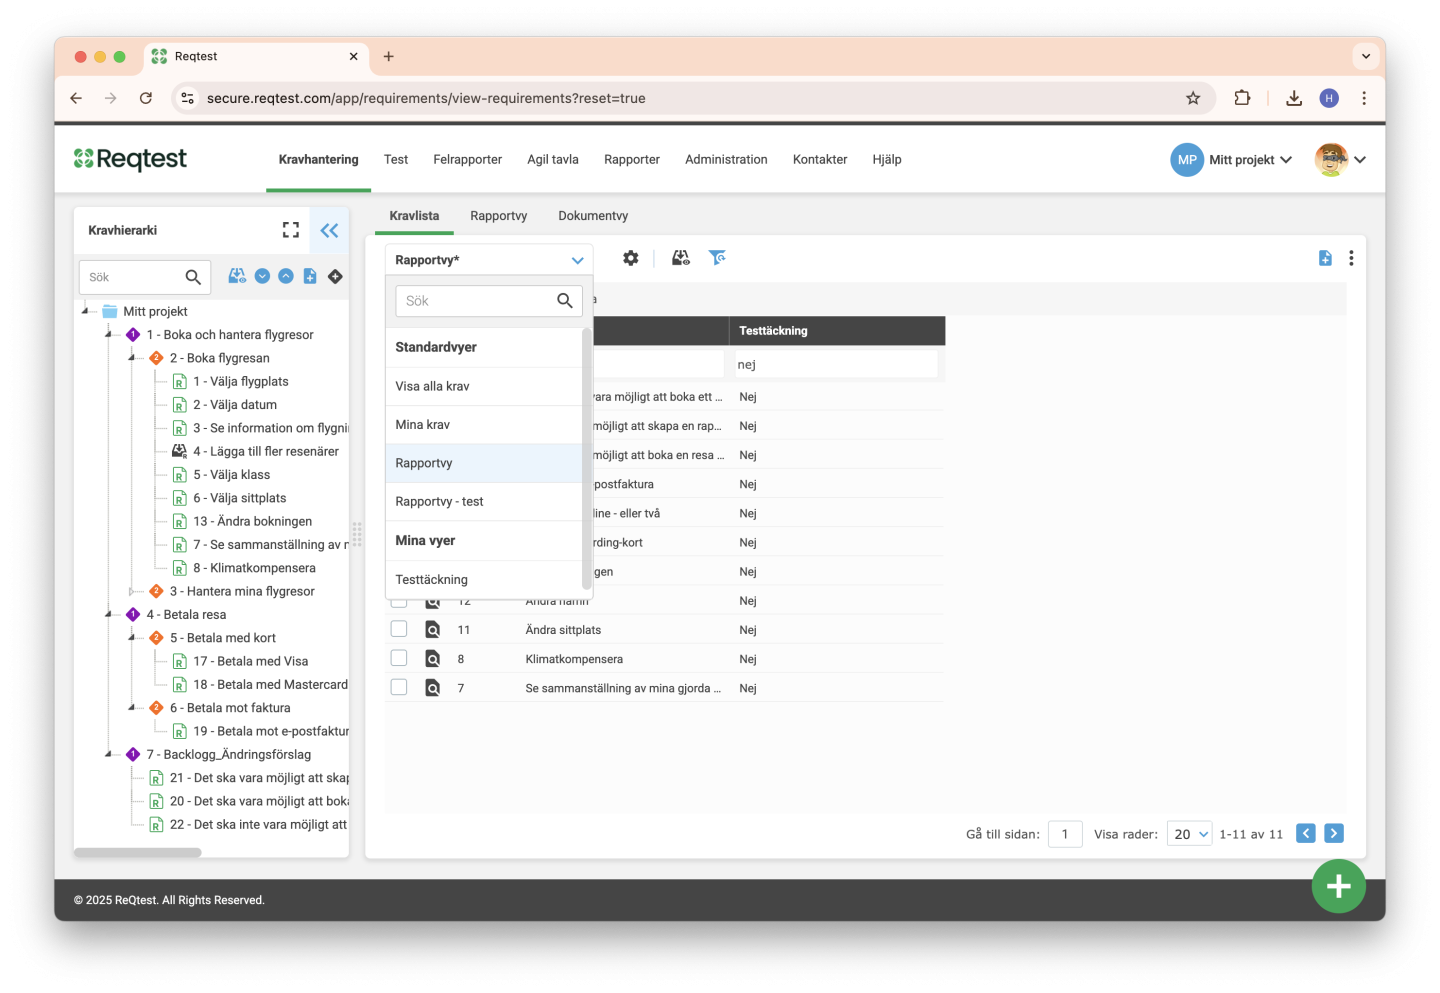
With views, you can save your searches so you can easily return to the same set of data. A saved view remembers which columns you have displayed and which filters have been applied.
Using the Manage Views function, you can share your views with others and choose which views you want to appear in your dropdown list.
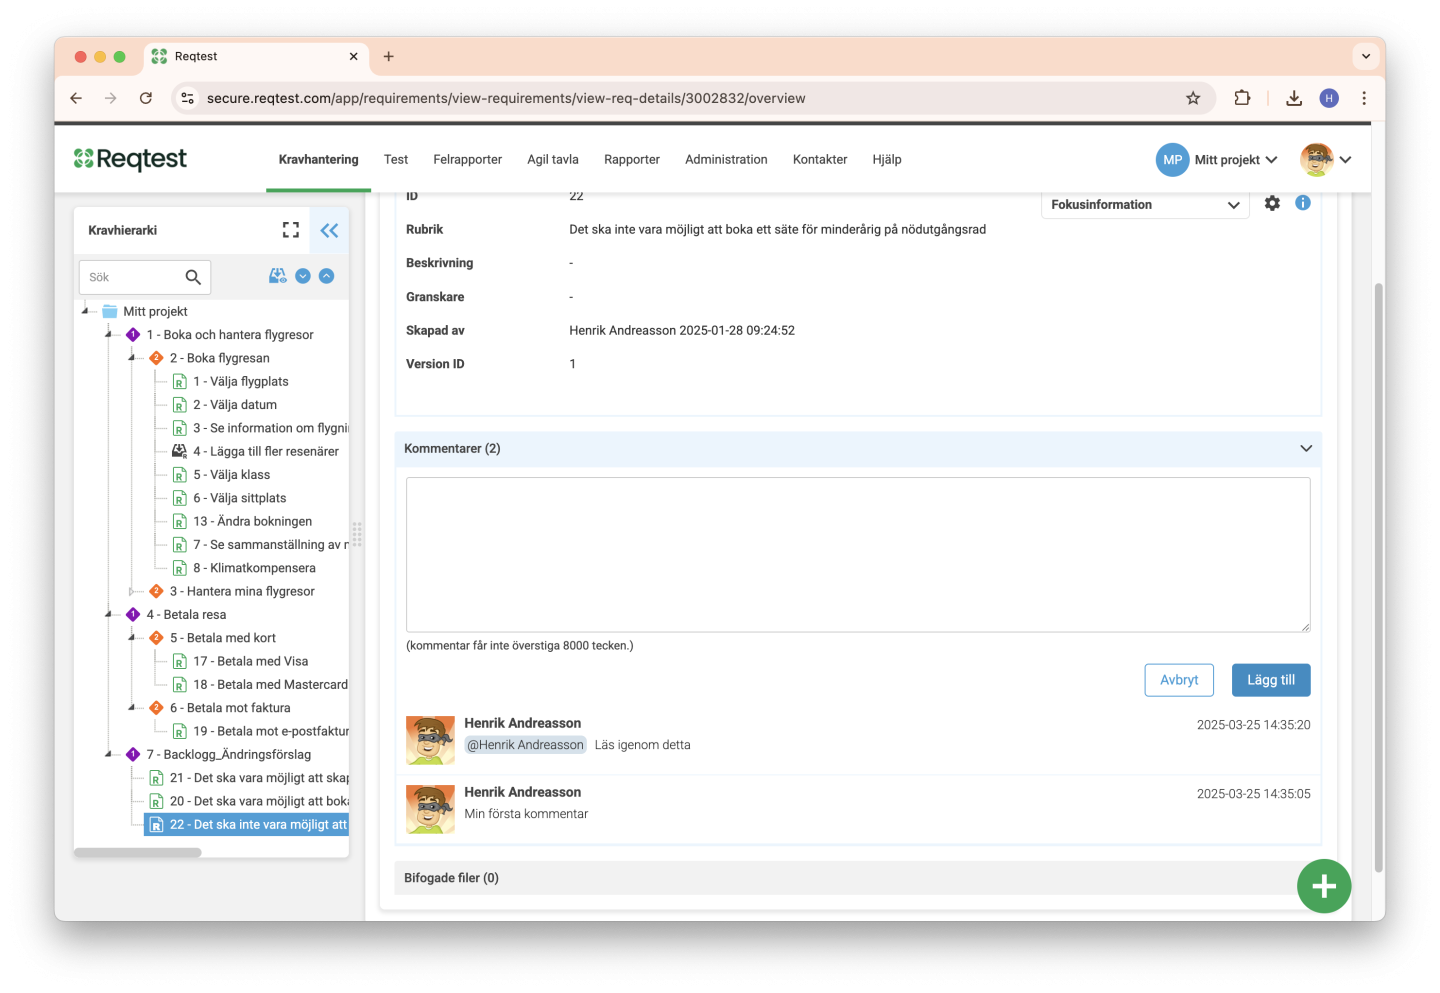
Views on Detailed Pages
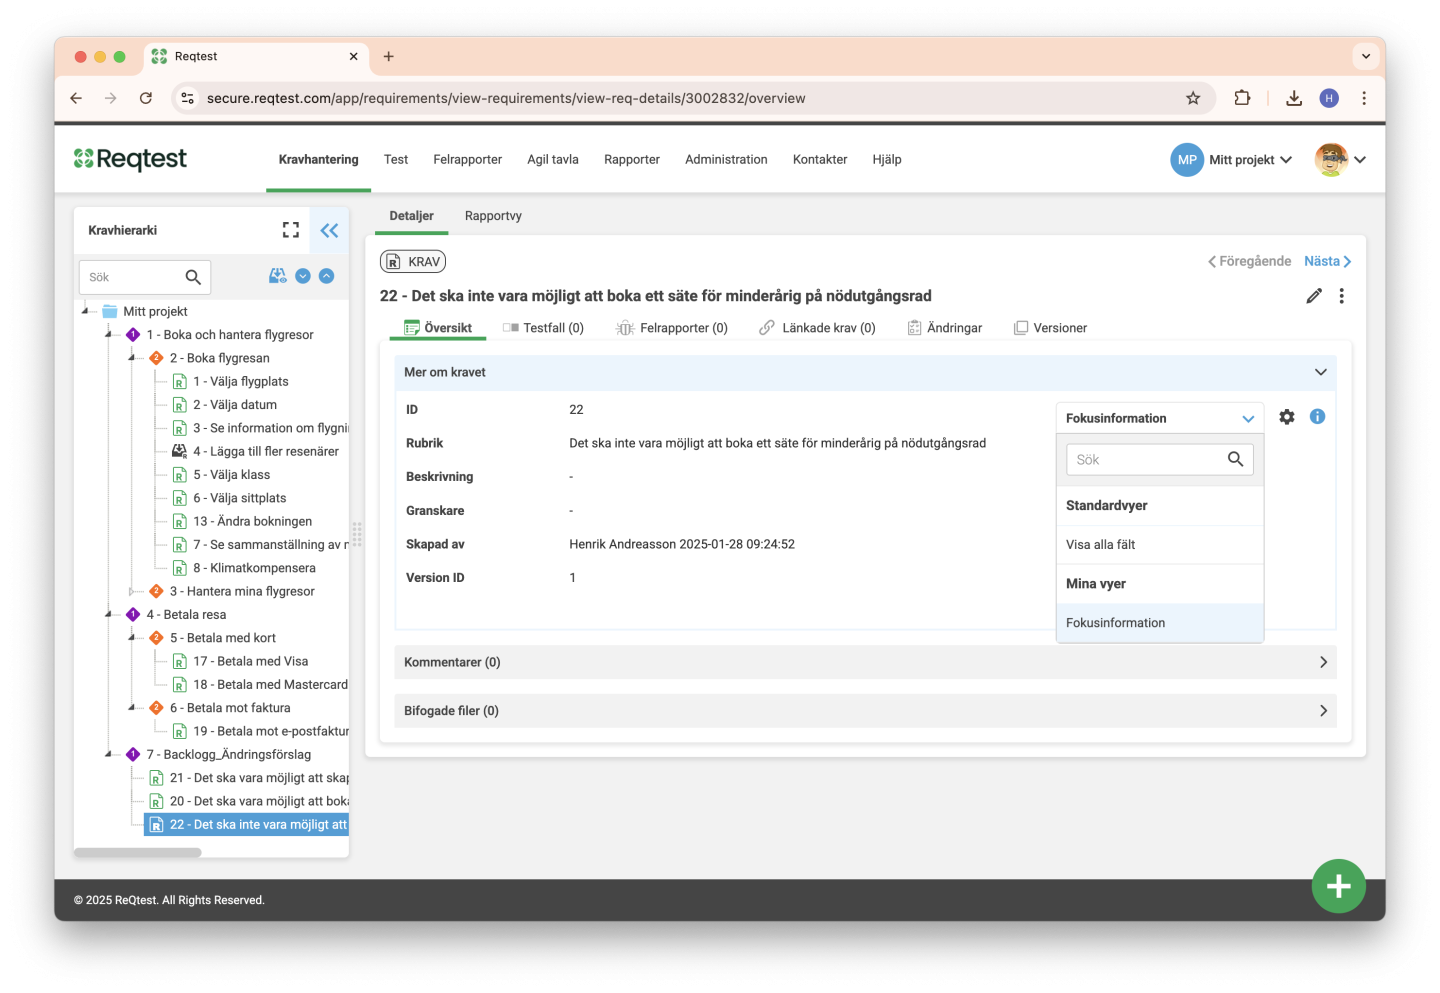
When you open a detailed page for a requirement, test case, or bug report, you can use object views to improve visibility. Object views allow you to choose which fields and information should be displayed.
For example, if a requirement contains many fields, you can create a view that only shows the most relevant ones. This makes the detailed page easier to navigate and more focused on the information you need.
Archiving
Most items in Reqtest can be archived. The advantage of using the archive function (instead of deleting) is that you can always find and restore the item later.
To make it easier to find and manage archived items, you can choose to display in the lists:
- Only active items
- Only archived items
- Both active and archived items
Comments
The comment function is available for most items in Reqtest. Comments appear in chronological order. A useful tip is to use @ to tag one or more project members. When you tag a project member, they receive an email with your comment and a direct link to the item where the comment was made.
Import / Export
You can import various items, such as requirements, into a Reqtest project from a CSV file.
If you are working in Excel, you can save the document as a CSV file to ensure it has the correct format for importing. To import data into your Reqtest project, you need to make sure that the fields in your file match the fields in Reqtest.
You can either adjust the form in Reqtest to match the fields in your file, or modify the fields in your document to align with your settings in Reqtest. Fields with matching names in both the document and Reqtest will be automatically mapped. If any values do not match, you can set the value to Does not match.
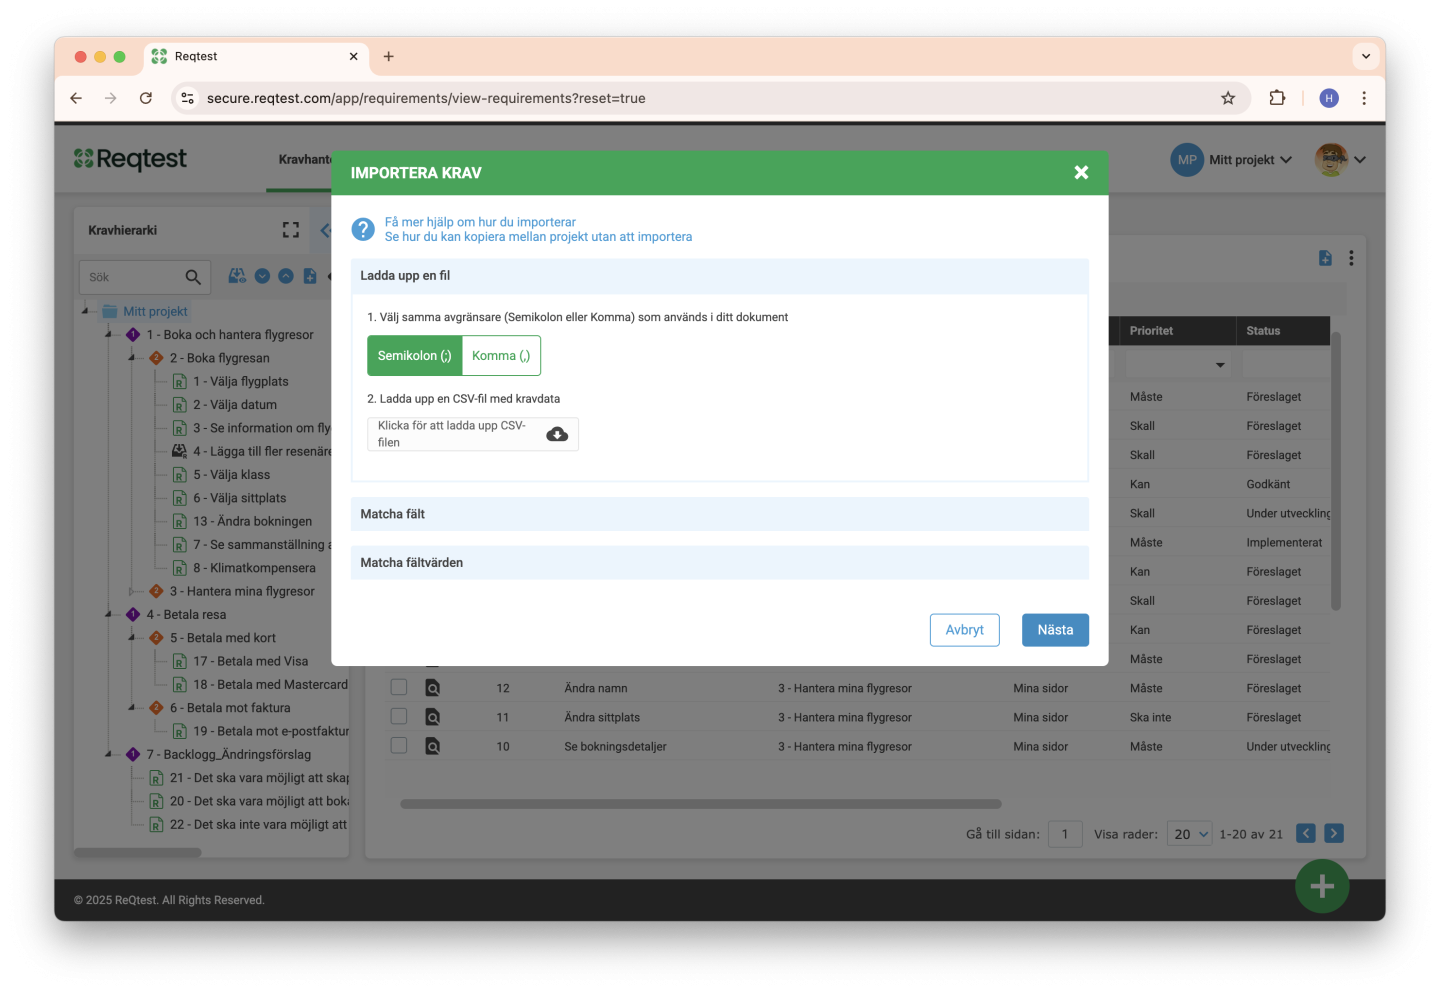
The process for importing data into Reqtest:
- Make sure the fields you want to import are added in Customize Form.
- Ensure your Excel file is structured the way you want the data to appear in the Reqtest list view.
Tip: You can export a list from Reqtest based on your current fields. If you use that export as a template for your import, the structure will already be correct. - Save the file as a comma-separated CSV file.
- Click Import and upload your file.
- Match the fields in Reqtest to the columns in your CSV file.
- Finally, match the field values to one another.
Import Tips
-
You can also import users into Reqtest. This feature is available under Administration ? Create User, then select the Multiple Users tab.
-
If you want to copy information between your projects, the best options are Copy to Project or Clone Project.
-
If you need to move one or more projects to a different license, please contact your CSM and we’ll help you with the process.
Traceability
If you want to achieve traceability in Reqtest, you should link your items to each other. For example, by linking a test case to a requirement, you ensure test coverage.
You then include the test case in a test run. When you execute the test run, you receive a test run result and can also report any bugs that are found.
Working this way gives you full traceability across all your items in Reqtest.
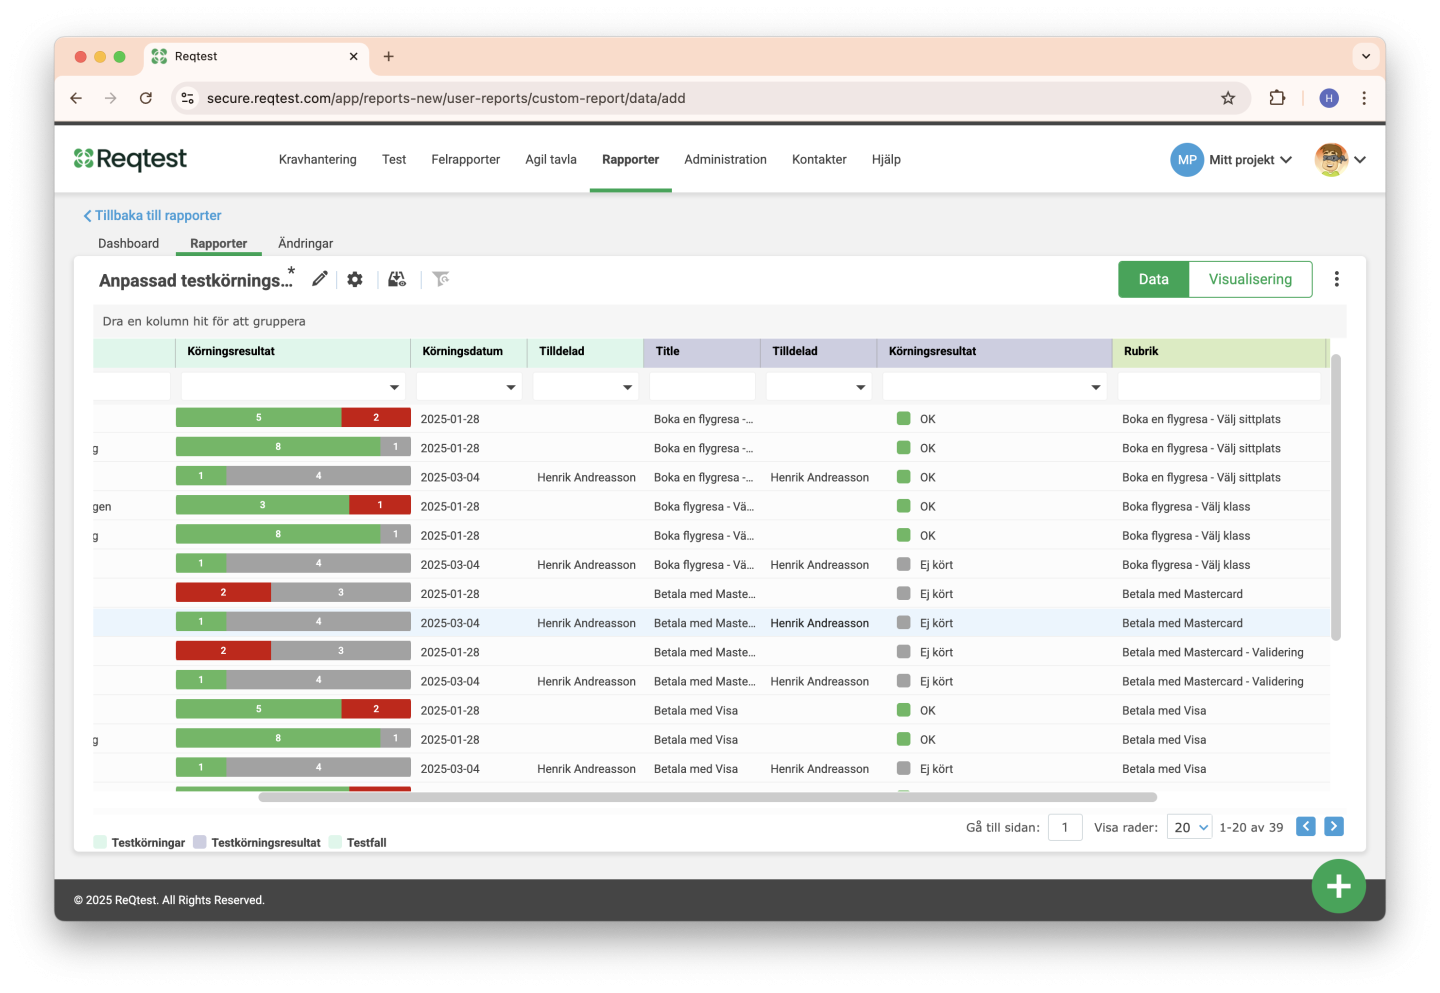
Another advantage is that you can also create reports based on data from multiple modules. For example, you can create a report that shows the number of bugs reported during test runs for the current sprint, grouped by the requirements scheduled for release.
Customize Form
With the Customize Form function, you can choose which information and fields you want to manage. Here you can configure which fields should be available, what type of information they store, whether they should be mandatory, and more.
Before you start using Reqtest, it’s a good idea to review the fields to ensure that all necessary information is included.
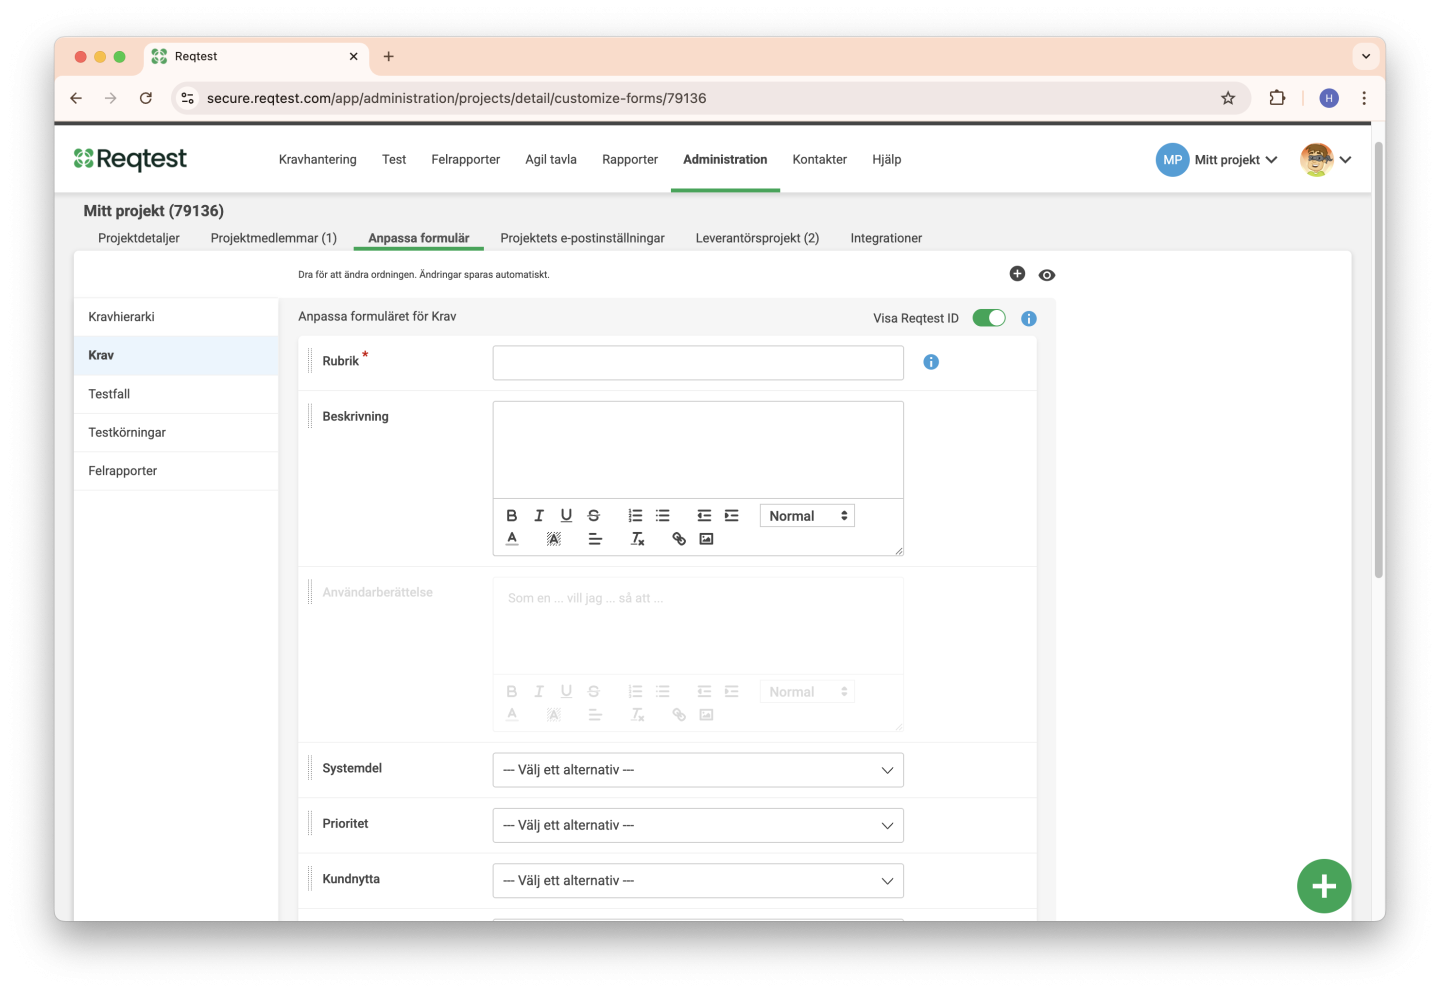
Here, you can also set the order in which the fields are displayed on the detailed view of the item.
Remember, you can use views on the detailed page to choose which fields you want to see when viewing the item’s details.
Create Templates
One of the most important features in Reqtest is the ability to share and reuse data across projects. You can do this using Copy to Project or Clone Project (read more below).
You can also create project templates, where both the project and all fields are preconfigured. When creating a new project, you can easily base it on a template by selecting it from the Based on menu.
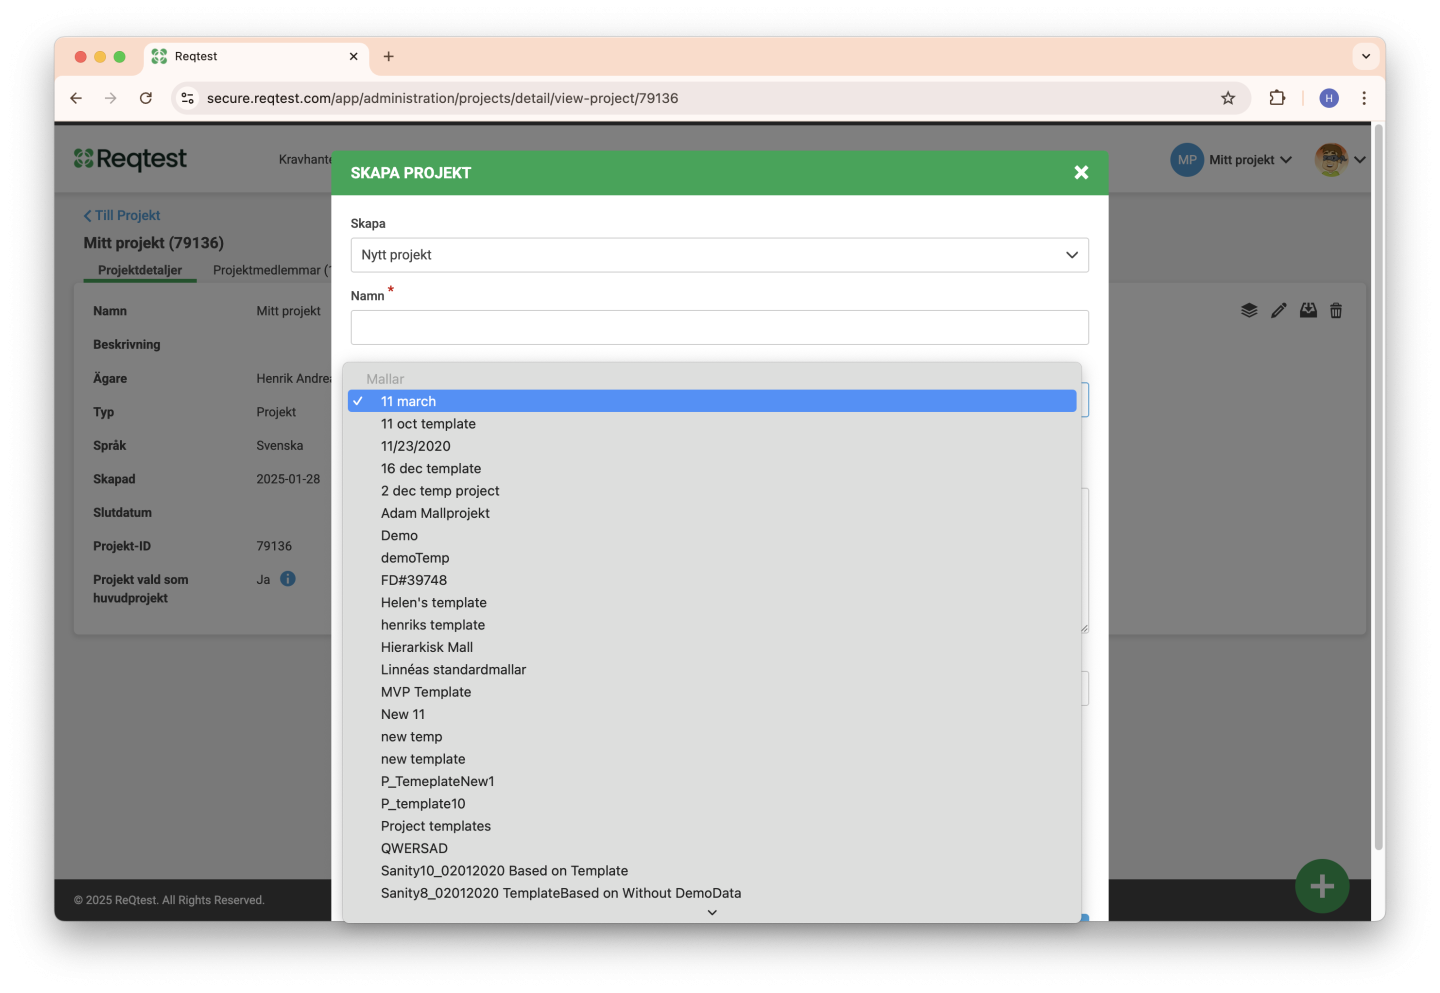
When creating a template, select New Project Template in the Create field. This template will then be available every time you create a new project.
Using templates is especially useful when starting a new project without reusing data from another one. If you do want to reuse data from an existing project, we recommend using Clone Project instead.
Clone Project
Templates are especially useful when starting a new project without reusing data from another project. However, if you need to reuse data from an existing project, we recommend using the Clone Project function.

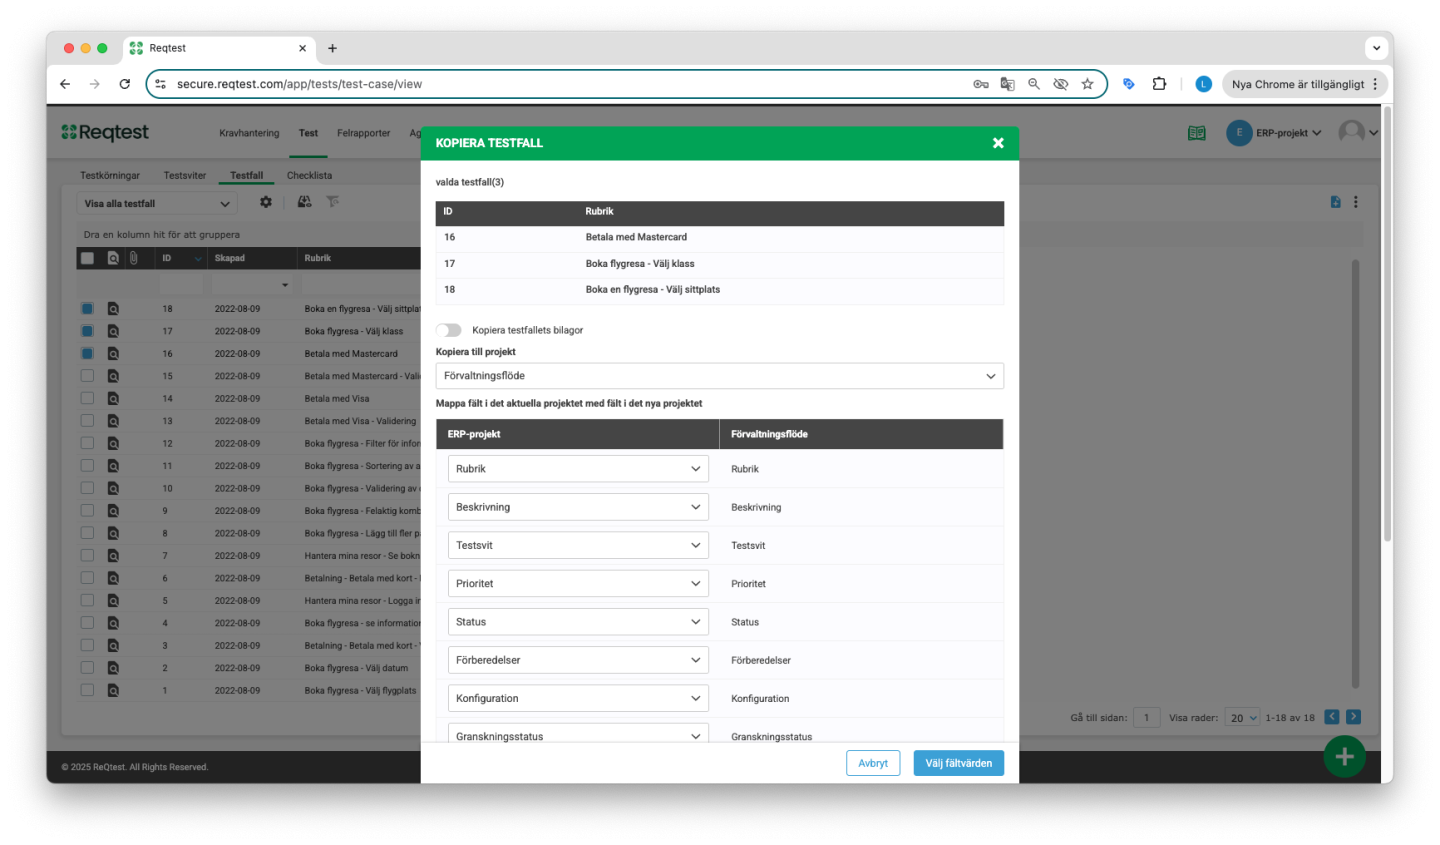
Copy to Project
You can choose to copy requirements, test cases, test runs, and bug reports to the same project or to another project. In the list view, the Copy to Project function is available in the kebab menu. The items you have selected in the list can then be copied either within the same project or to a different one.
If you are copying to another project, you will need to match the fields between the projects, as they may differ.